How to Install Python, Spyder, and R
Welcome to our comprehensive guide on installing Python, Anaconda Navigator, Spyder, and R! This step is a guide to help you get the technical requirements for our Data Visualisation Course.
Why Use Anaconda?
Anaconda is a powerful distribution of Python and R for scientific computing and data science. It simplifies package management and deployment, making it an excellent choice for beginners and professionals. With Anaconda, you can easily manage libraries and dependencies while working on various projects.
Step 1: Install Anaconda
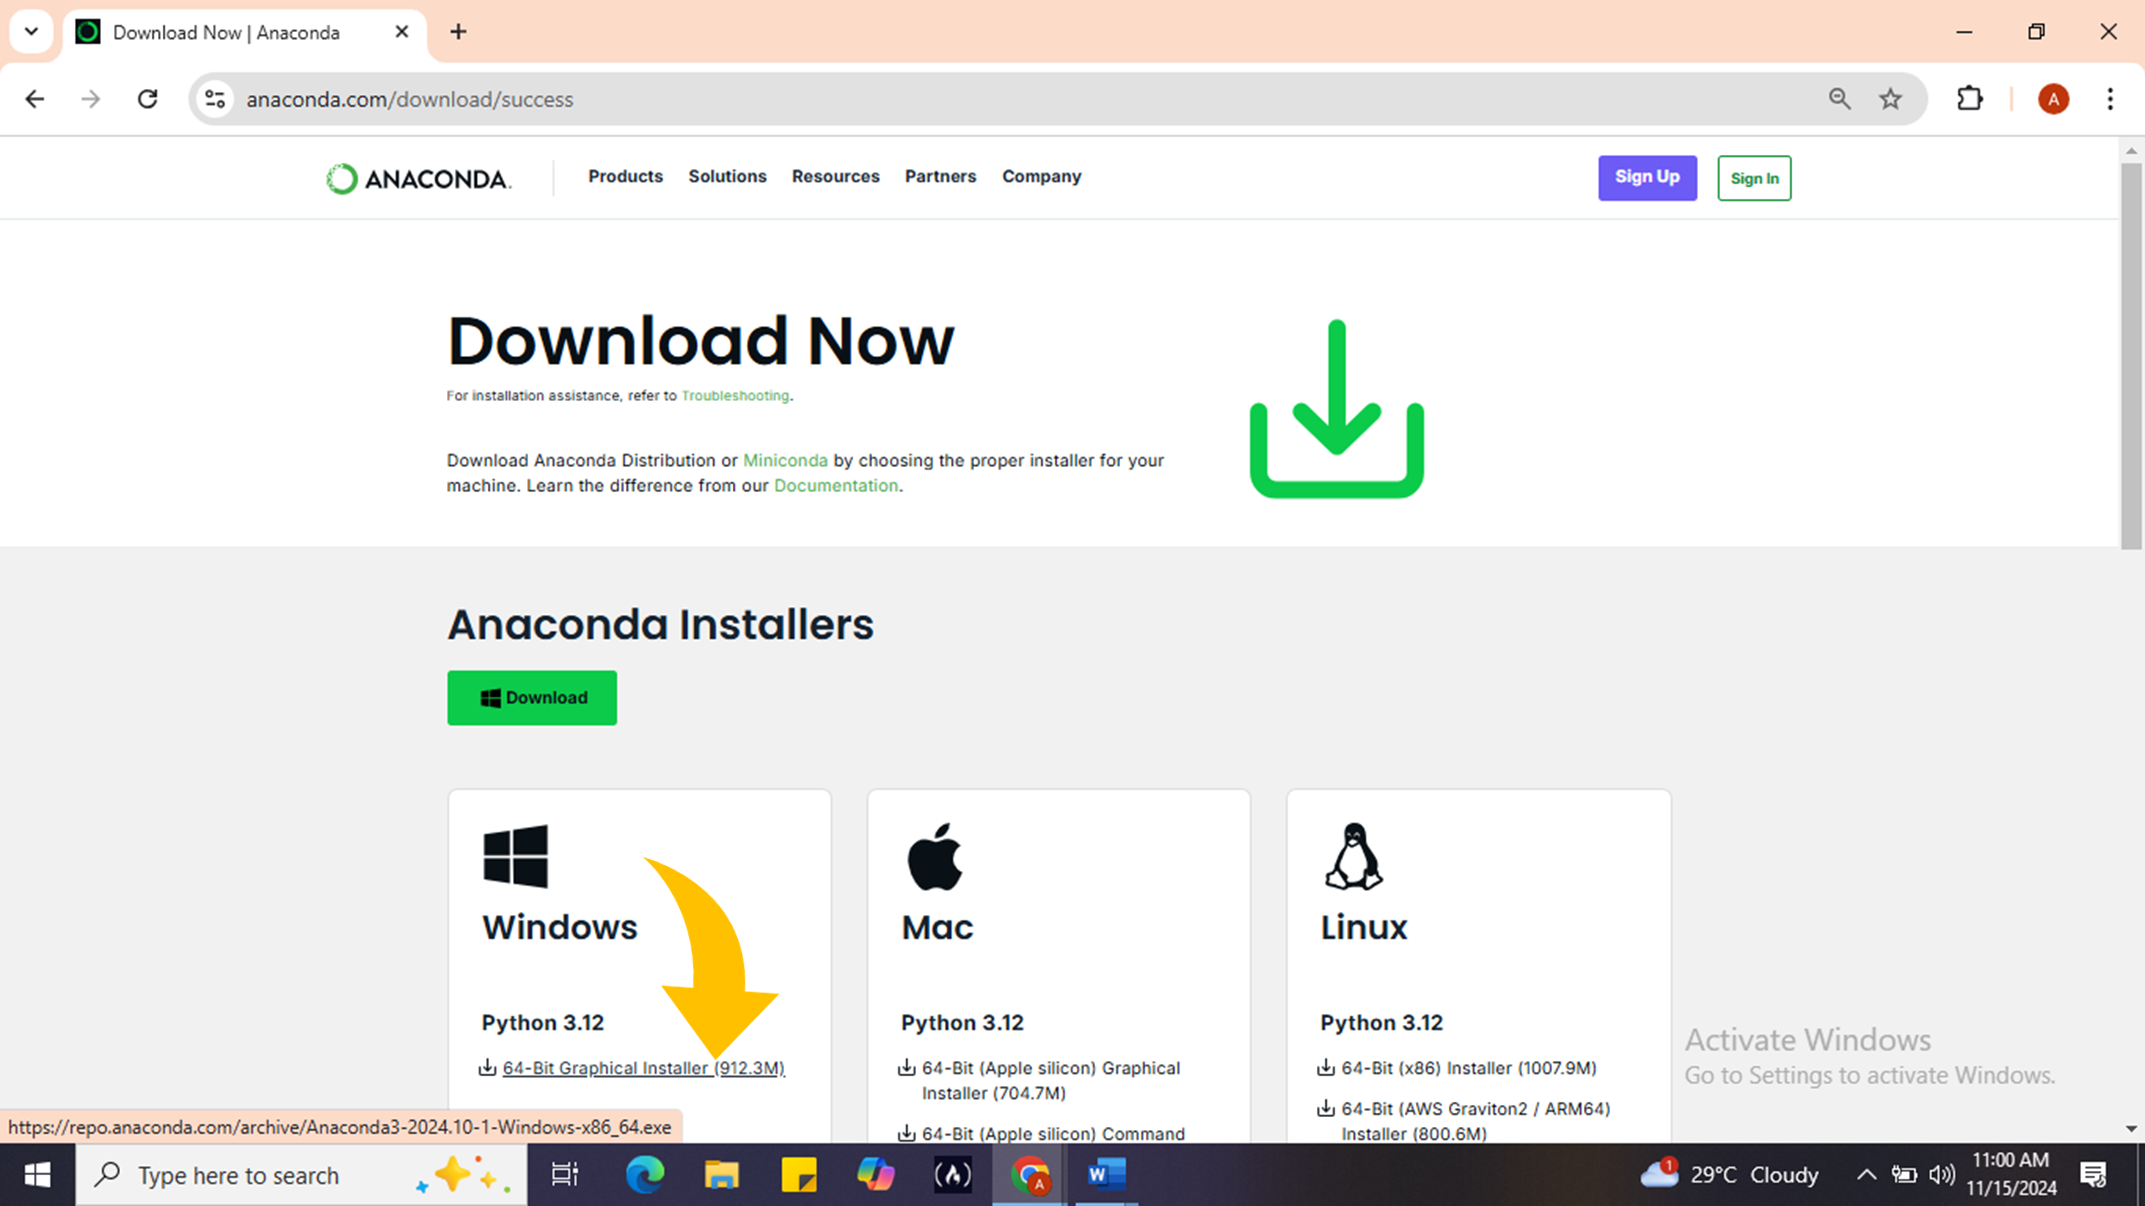
- Download the Anaconda Installer

First, head over to the Anaconda website and download the installer that corresponds to your operating system (Windows, macOS, or Linux). Make sure to choose the version that includes Python 3.12. (the current python version).
- Run the Installer
Once the download is complete, navigate to your Downloads folder and double-click the installer file.
- Click Next on the welcome screen.
- Accept the License Agreement
Read through the license agreement carefully. If you agree with the terms, select I Agree to proceed.
- Choose Installation Type
You will be prompted to select an installation type. Choose Just Me (recommended) unless you need to install it for all users on your computer. Click Next.
- Select Installation Location
Choose a destination folder for Anaconda. It’s best to avoid paths with spaces. Click Next once you’ve made your selection.
- Advanced Options
You may see options regarding adding Anaconda to your PATH environment variable. It’s generally recommended not to check this box unless you have specific needs.
Click Install to start the installation process.
- Complete Installation
Once the installation is finished, click Next, then Finish to exit the installer.
Step 2: Launch Anaconda Navigator
Now that Anaconda is installed, let’s open Anaconda Navigator:
- Search for “Anaconda Navigator” in your Start menu (Windows) or Applications folder (macOS).
- Launch the application by clicking on it.
Step 3: Install Spyder
Spyder is a popular Integrated Development Environment (IDE) for Python that comes with many useful features for data analysis and visualization.
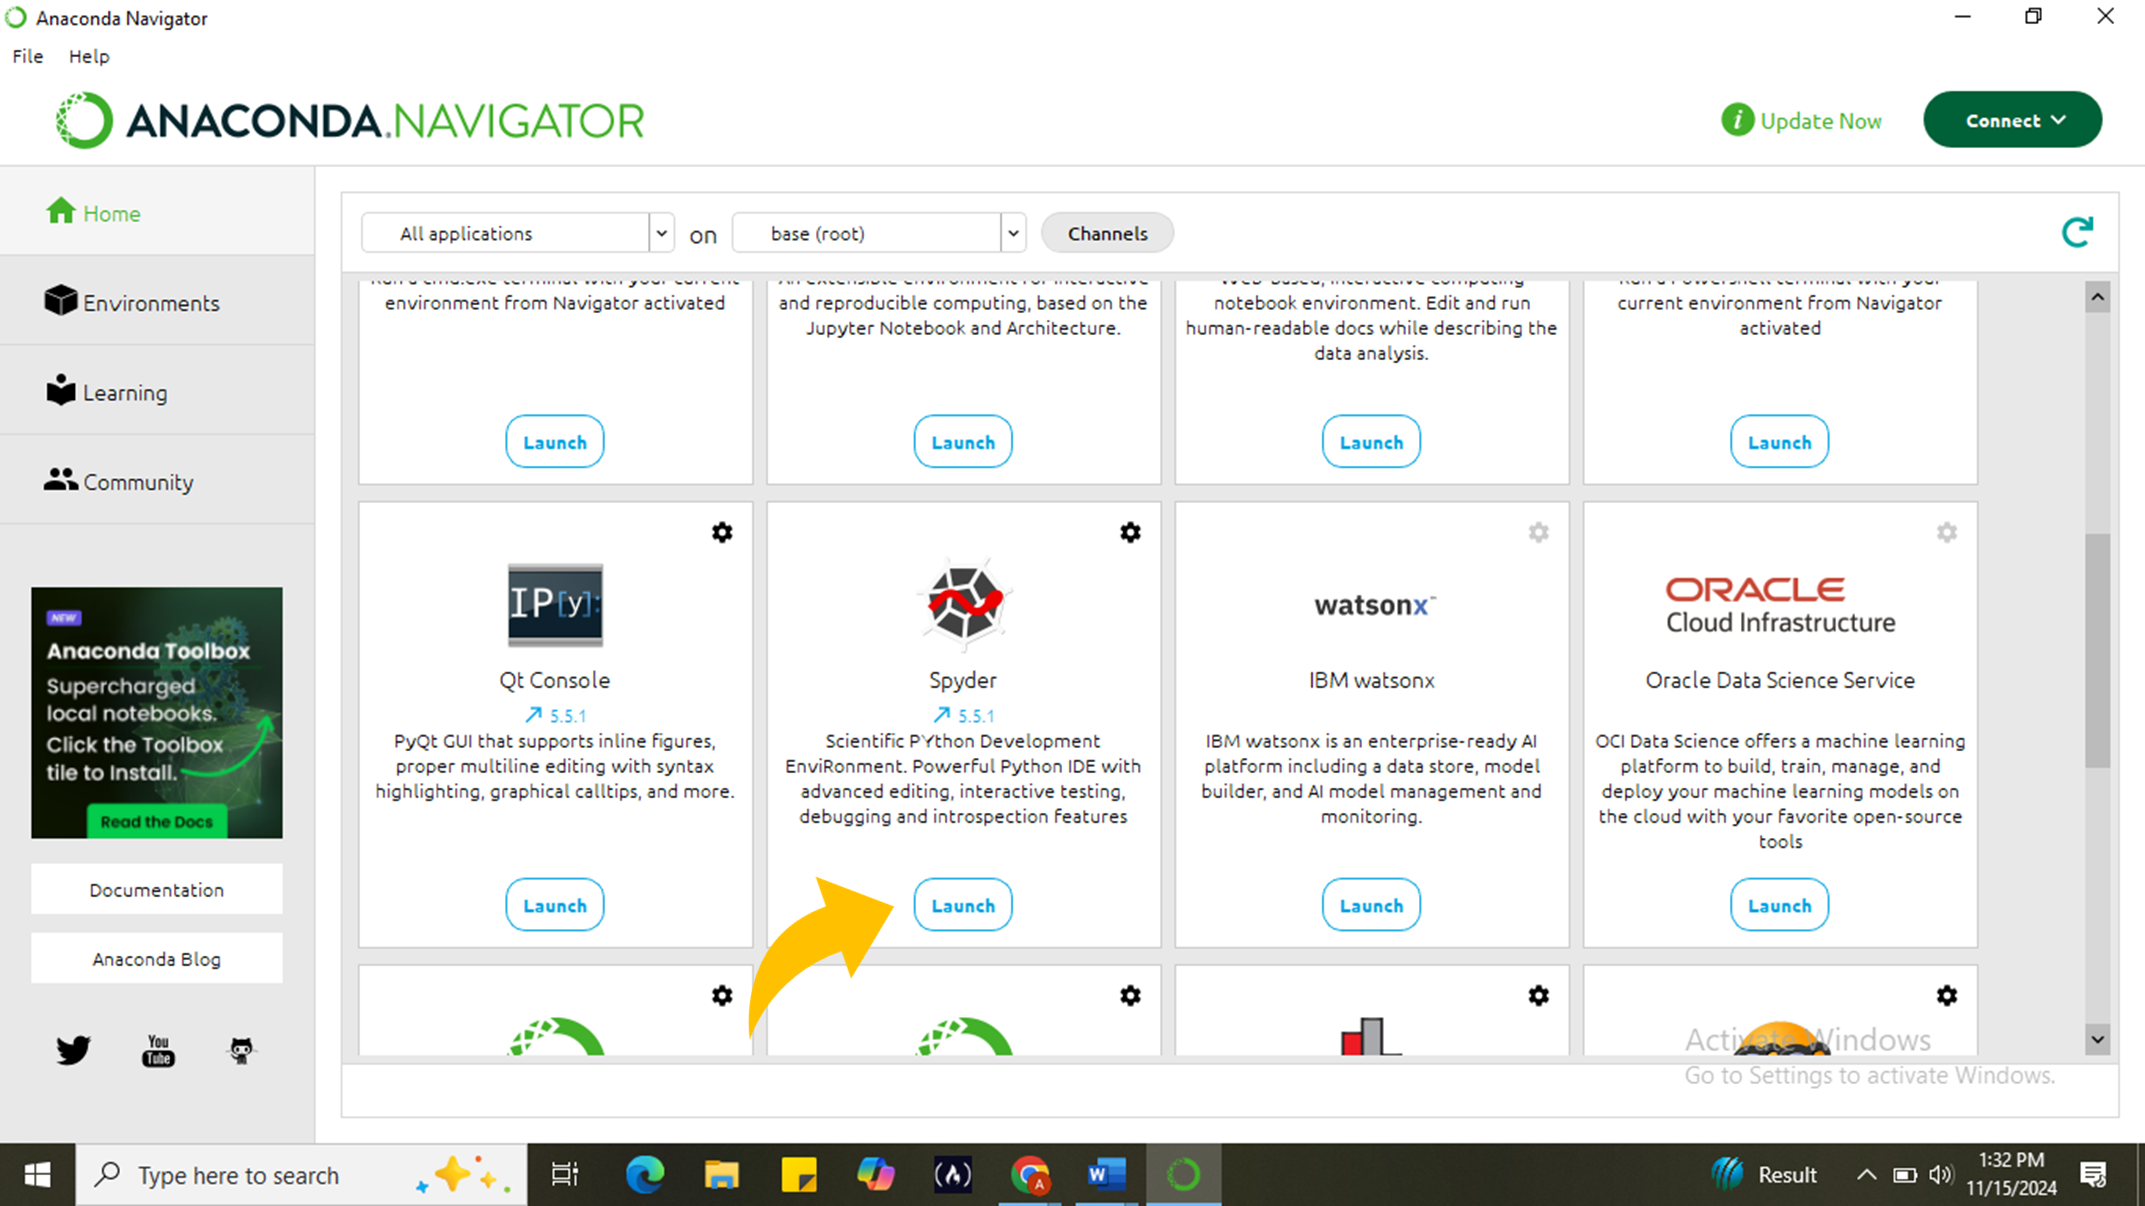
- Find Spyder in Navigator
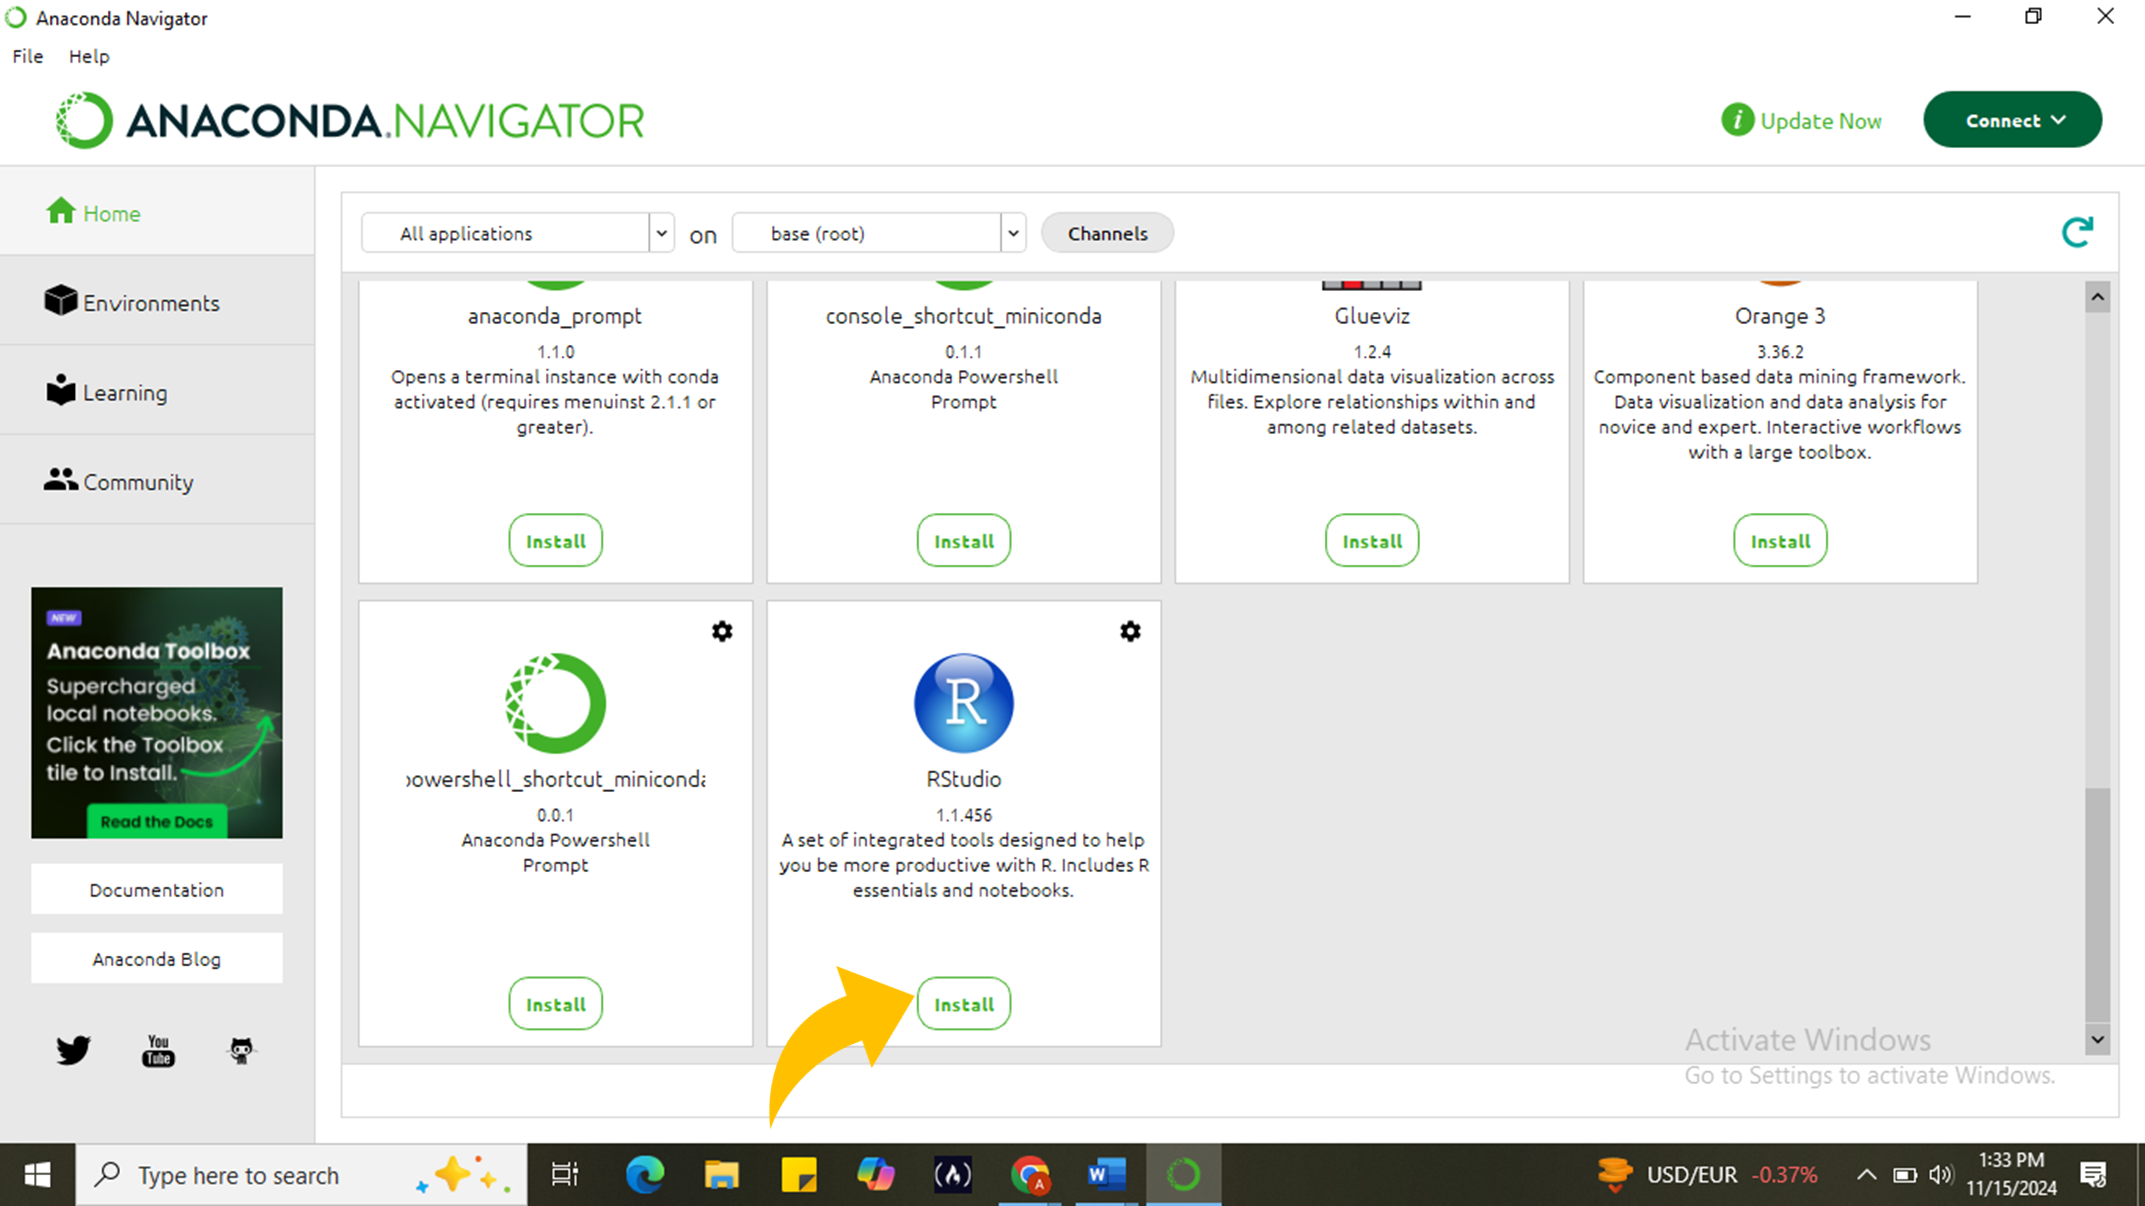
In Anaconda Navigator, navigate to the Home tab where you will see various applications available for installation.
- Install Spyder
If Spyder is not already installed:
- Look for Spyder in the list of applications.
- Click on the Install button next to Spyder.
- Wait for a few moments while the installation completes.
Step 4: Install R
R is another powerful language widely used in statistical computing and graphics. Here’s how to install it through Anaconda Navigator:
- Create a New Environment for R (Optional)
Creating a new environment can help keep your projects organized:
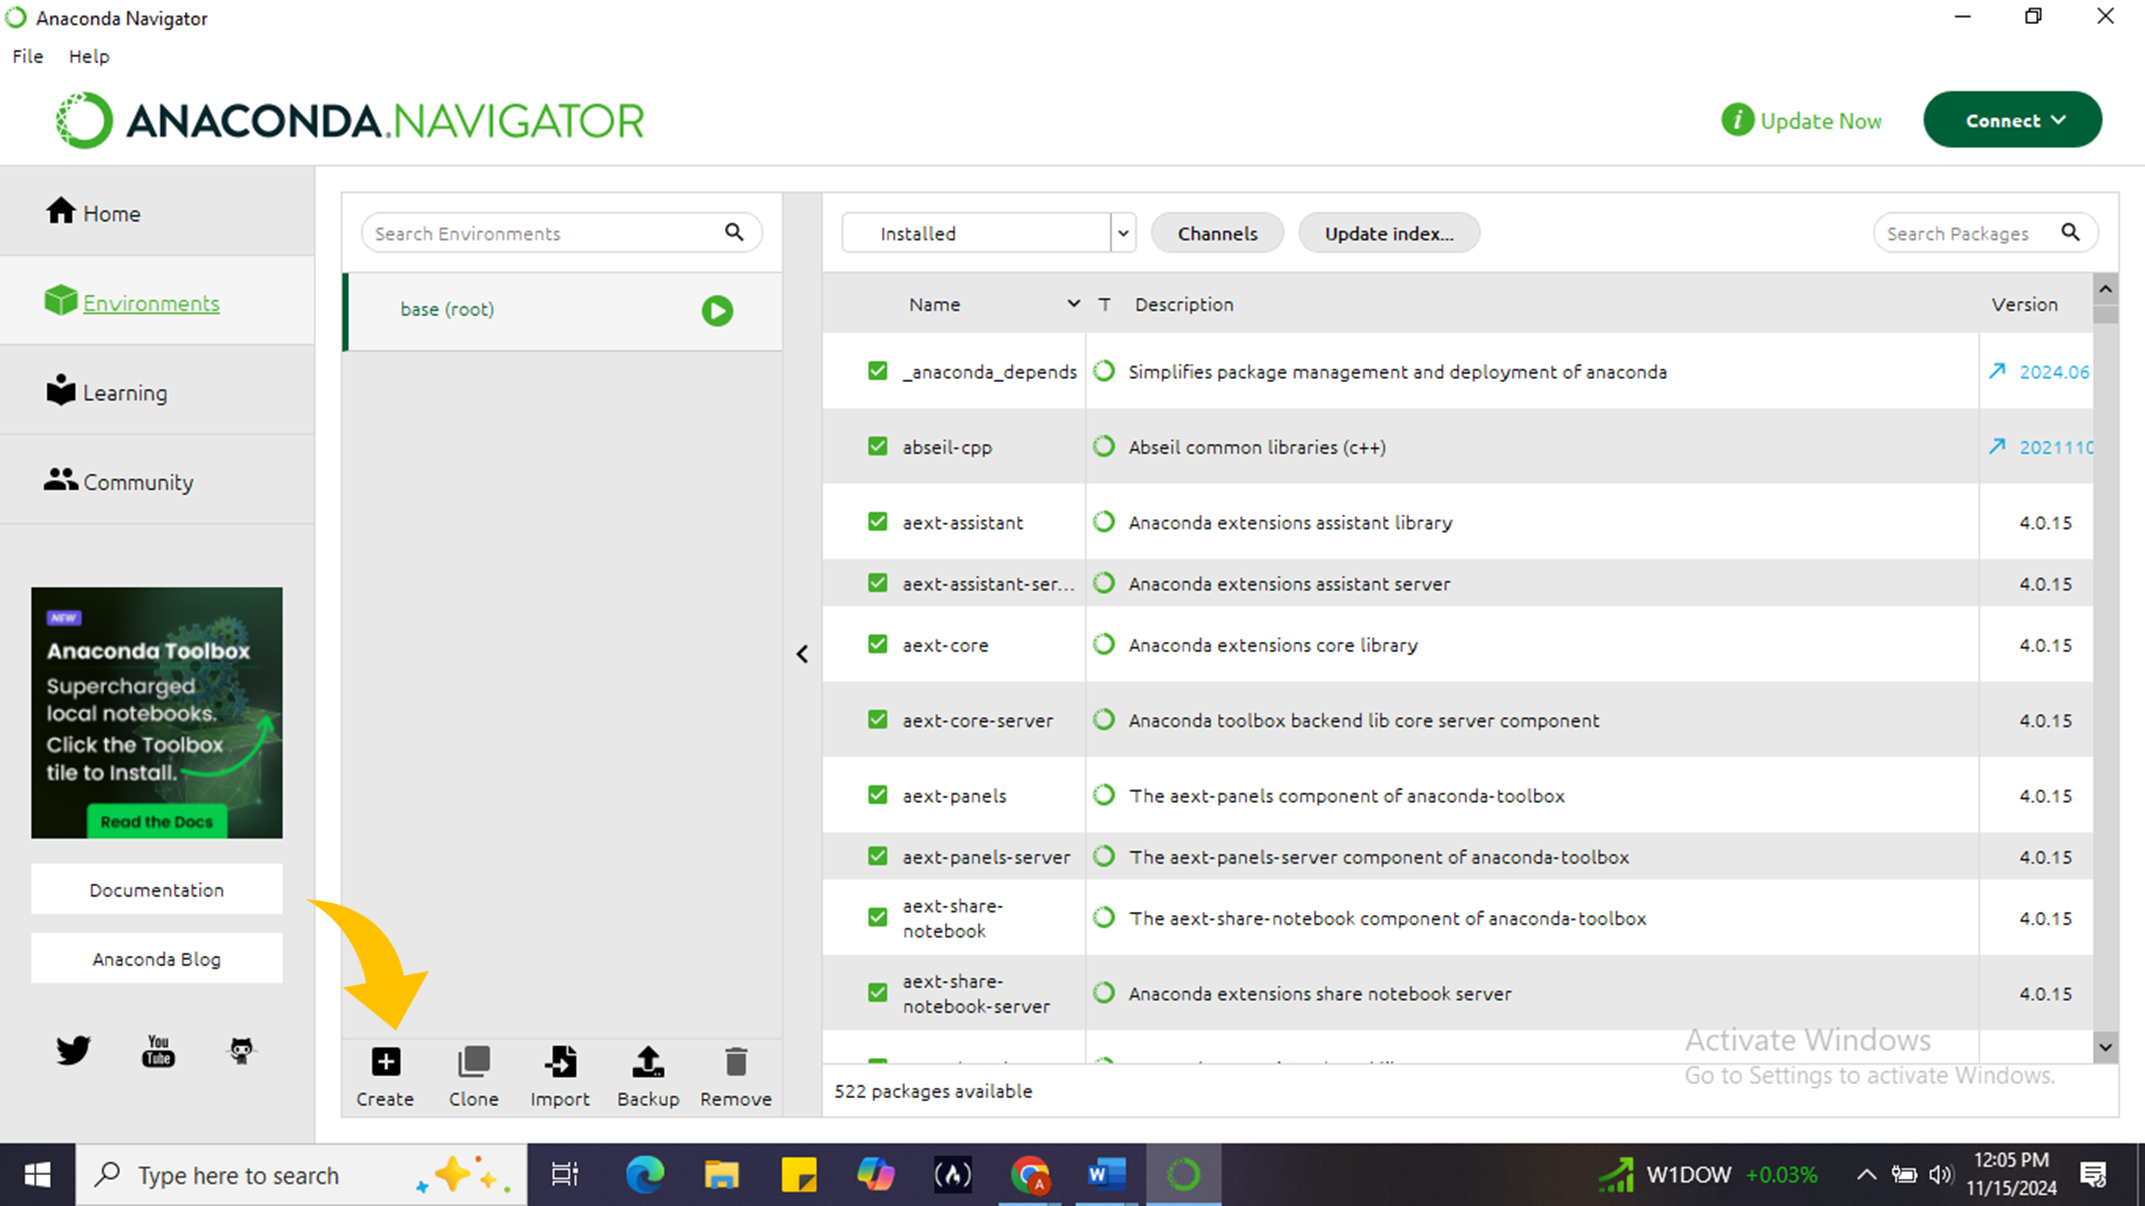
- Go to the Environments tab in Anaconda Navigator.
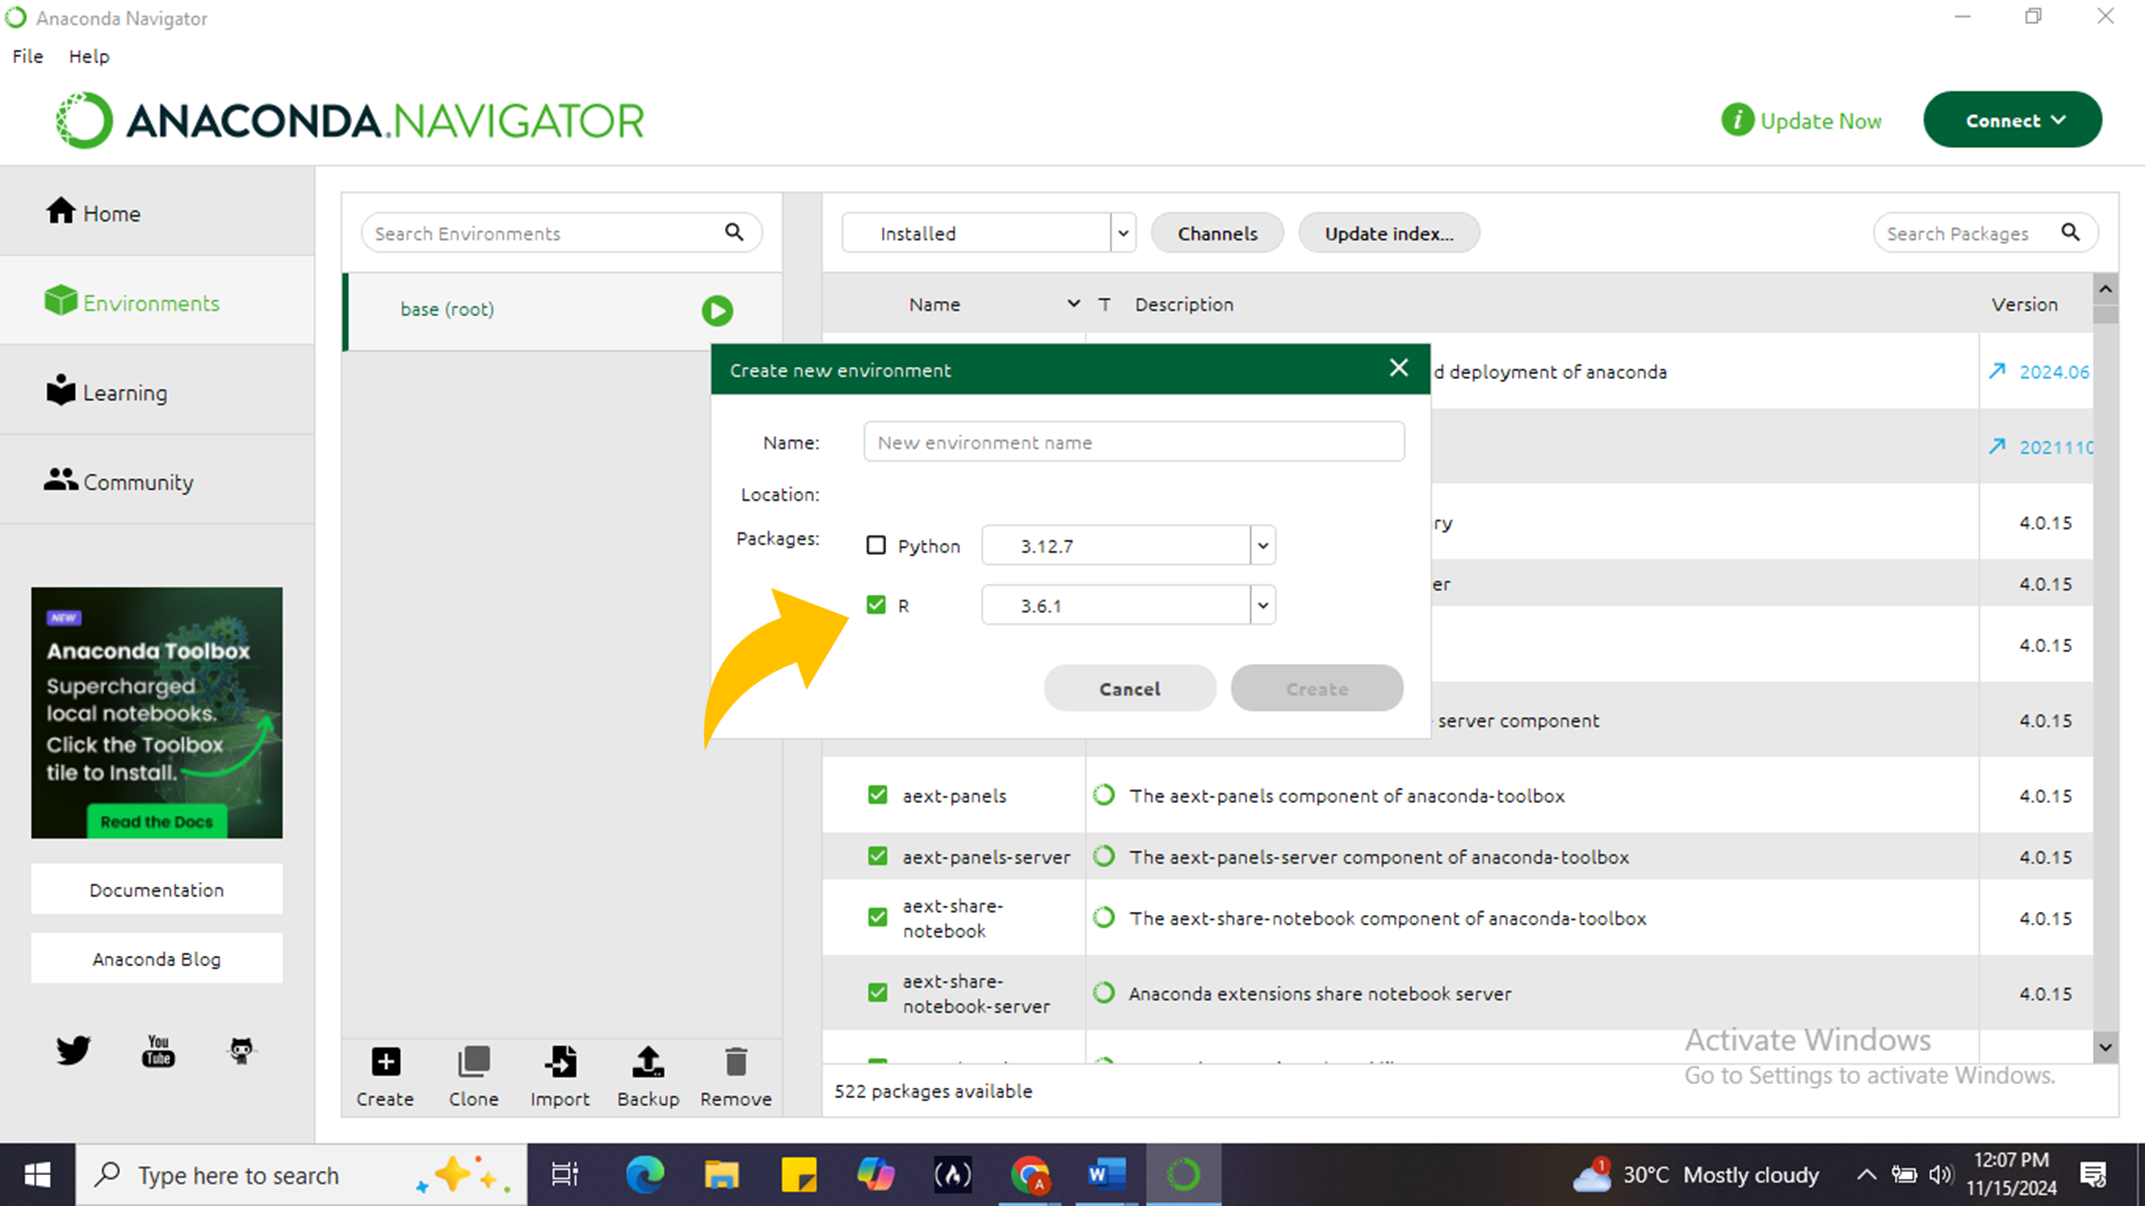
- Click on Create, name your environment (e.g., r_env), and select R from the package list.
- Click Create to set up this new environment with R.
- Install R Packages
Once your environment is created:
- Select it from the list of environments.
- Use the search bar to find additional R packages you might need (like r-essentials).
- Check the box next to each package and click Apply to install them.

Step 5: Launching Applications
You’re almost there! Now that everything is installed:
- Go back to the Home tab in Anaconda Navigator.
- You can launch Spyder or any other application by clicking on their respective launch buttons.
- For R applications, ensure that you activate your R environment before launching them.
Conclusion
Congratulations! You have successfully installed Python via Anaconda, set up Anaconda Navigator, and installed both Spyder and R. You’re now ready to embark on your data visualisation journey!


